Tuesday, April 30, 2013

Don't Worry, Be Happy!


I have been having a WONDERFUL week! The weather is finally getting warmer, the grass is green again, flowers are blooming...I just can't help being happy! My shipment of nail plates came in and when I saw this on BundleMonster's 2012 plates, I knew what I had to do. BM304, Sally Hansen's "Lightening" and Wet n Wild's "Ebony Hates Chris". Very simple but a very happy mani.

Nail Mail!! So happy to see this show up in my mail box.
2012 set and the special Christmas plate they still had in stock.

Happy Happy

Wednesday, April 24, 2013

Butterfly Wings


There is a stamping plate that makes this image, but I don't have it so I decided to give it a shot freehanded. I  LOVE it!! I'm just not sure I can do this on my own nails. If I can successfully do it on my real nails I'll  write up a tutorial for it. Pure Ice "Hot Tamale" and Stripe Rite black and white stripers. Out the Door "Northern Lights" topcoat.

Tuesday, April 23, 2013

How To Water Marble


Water Marbles are what started it all for me. This stunning technique takes some practice to get the hang of, but when you do the results are amazing. Water marbles are time consuming, so be prepared to set a few hours aside, find a quiet corner to work, put some background music on, and create!

This is a photo heavy tutorial. Check out the process after the jump...

Monday, April 22, 2013

Earth Day Water Marble


So a few days ago, when we had a brief spot of sunshine, I decided I was gonna take the pics I need for a water marbling how-to post. Simple enough, right? I've done a few marbles by now and know what I'm doing. Well, nothing wanted to work that day. My workshop was cold, the water was cold, the polish was cold, nothing was working right. Polish didn't spread on the water, and when it did, it dried instantly so I only had time to take one picture, then have to restart the process for the next picture. But I soldiered on and got some pics taken. They were awful. Disgusted with getting nothing accomplished I walked away for a few more days. Today is Earth day and for the first time this week it was beautiful outside! The sun was shining, my workshop was warm with light streaming in. It was a happy day so I decided to give marbling another shot. I've never had a water marble go better! It went so well that I could stop and take pics and the polish still hadn't dried yet so I could continue without have to restart the process for each pic. It was like the polish was apologizing for misbehaving the last time :)

Anyway, here is my Earth Day mani. Sinful Colors "Exotic Green" and "Nirvana". Tomorrow I'll post how to do a water marble yourself!

Tuesday, April 16, 2013

China Glaze Hologlam ~ Sunny Pictures

Finally the sun came out today so here are the promised sunny pics. Sorry for the awkward angles, I was trying to use the first beam of light to shine into my workshop. Original post here.

As pretty as these are in shade, they are stunning in sunlight. I am so in love with holos and need to get more. Lots more.


Friday, April 12, 2013

China Glaze Hologlam


I have been waiting for this polish for nearly a year since I saw it on Polish Galore last year. I missed out on China Glaze's OMG collection and was ridiculously excited to see them come out with another holographic. I only have one other brand to compare it to, Layla's Hologram Effect , but I understand that China Glaze's formula is different from other brands out there. I've applied this to my mom's naked nails, my base coated nails, and my plastic practice finger. Naked nails were beautiful, only one or 2 coats to cover it. My base-coated nails kept getting bald spots. I don't know why because I'm sure the base-coat was dry when I applied the holo. It took 3 or 4 coats to cover bald spots. Practice finger(no basecoat) was a one or 2 coat cover as well. What is interesting is these polishes paint on almost matte and dry to reveal the holo effect. So don't panic if you don't see the holo right away, it will show up. Now holographics tend to run more expensive than regular polishes, so I assumed they were going to run about 14 dollars. No idea where I got that number from. Regular China Glaze is 6 or 7 bucks, the holo collection is 8.99. Not bad at all. And through the month of April all the polishes are buy 2 get one free, hence the first 3 I picked up. I hope to get more, there are 12 in the collection, but money is tight so I'll have to settle for these first 3 for now.

I have some pictures, but the sun hasn't been shining for the last couple days so all the pics are in shade. Stupid rainy April messing up my pictures. When the sun shines at last I'll take some more pics and update this post. They are lovely colors even in the shade, but you can barely see the holo effect in shade or indoor lighting. Wacky Laki has some nice holo pics you can check out for now til I get my better shots.

Check out my first 3 China Glaze Hologlam colors after the jump.


Tuesday, April 9, 2013

Paint Splatter Nails


This was also done a long time ago. No topcoat or much in the way of clean up, but it is still a favorite of mine. I think I'll do this art again soon. It was a lot of fun to do and looks impressive even tho it is super easy. Pro tip: Start with your lightest or most transparent color when painting the splatters. Trying to paint the transparent over the darker colors will give you a headache. The base white is Sally Hansen "White On" and the splatters are Sally Hansen "Blue It" and "Lightning" and Bath and Body Works "Candy Apple Cream". The green is an ancient Sinful Colors bottle I have called "Daisy the Pig". It's so old, the bottle doesn't look anything like the current round bottle types they sell now. This was all made with a toothpick and I think if it was topcoated it would look so much better.

Monday, April 8, 2013

Facebook Nails

Everyone's favorite social media site :)

Here's another old mani of mine from last year. I did this around Valentine's Day. Painted my nails white and drew some hearts on it with a toothpick, but they turned out so badly I painted right over the top of them. Not bad, but like my old manicures I didn't take the time for cleanup or decent pictures. And the hearts show thru the blue if you look close enough. Sally Hansen "Blue It", "Blue Me Away", and "White On".

Thursday, April 4, 2013

Glue Basecoat


After reading Wacky Laki's discovery of peel off basecoat, I decided to give it a shot.This is a fascinating way to remove glitter polish and so much faster than the tin foil method. The idea is simple, instead of using a basecoat, paint your nails with plain white glue. Then put on your colors and glitter. When it's time to take it off, it just peels off and leaves your nails clean and ready in minutes. Well, that's the idea anyway. My test wasn't quite that black and white.

My results after the jump...

Wednesday, April 3, 2013

Blue Flowers


April Showers bring May Flowers, or so the poem goes. I hope the flowers get here soon. The nails are Sally Hansen "Blue It" with the accent nail Pure Ice "Bikini". The stamping on the accent is also "Blue It" but the pastel blue of Pure Ice didn't want to show up well so I stamped in white instead, Sally Hansen "White On". Fing'rs B17 (a copy of Konad M20) was the stamp for the fingers with the accent nail being BundleMonster BM224. A very simple and easy stamping.

Monday, April 1, 2013

Fair Share of Fails

Not every manicure is a work of beauty. In honor of today, here are the mani's that made a fool of me:

Polka Dots


It started out as a good idea. Stamp the accent nail and mimic the stamping on the others as a french. I created this for a contest. It turned out so bad that I really don't think I entered it...tho I really don't remember. I may have anyway. I still like the idea, maybe I'll give it another shot one day.

Cherries

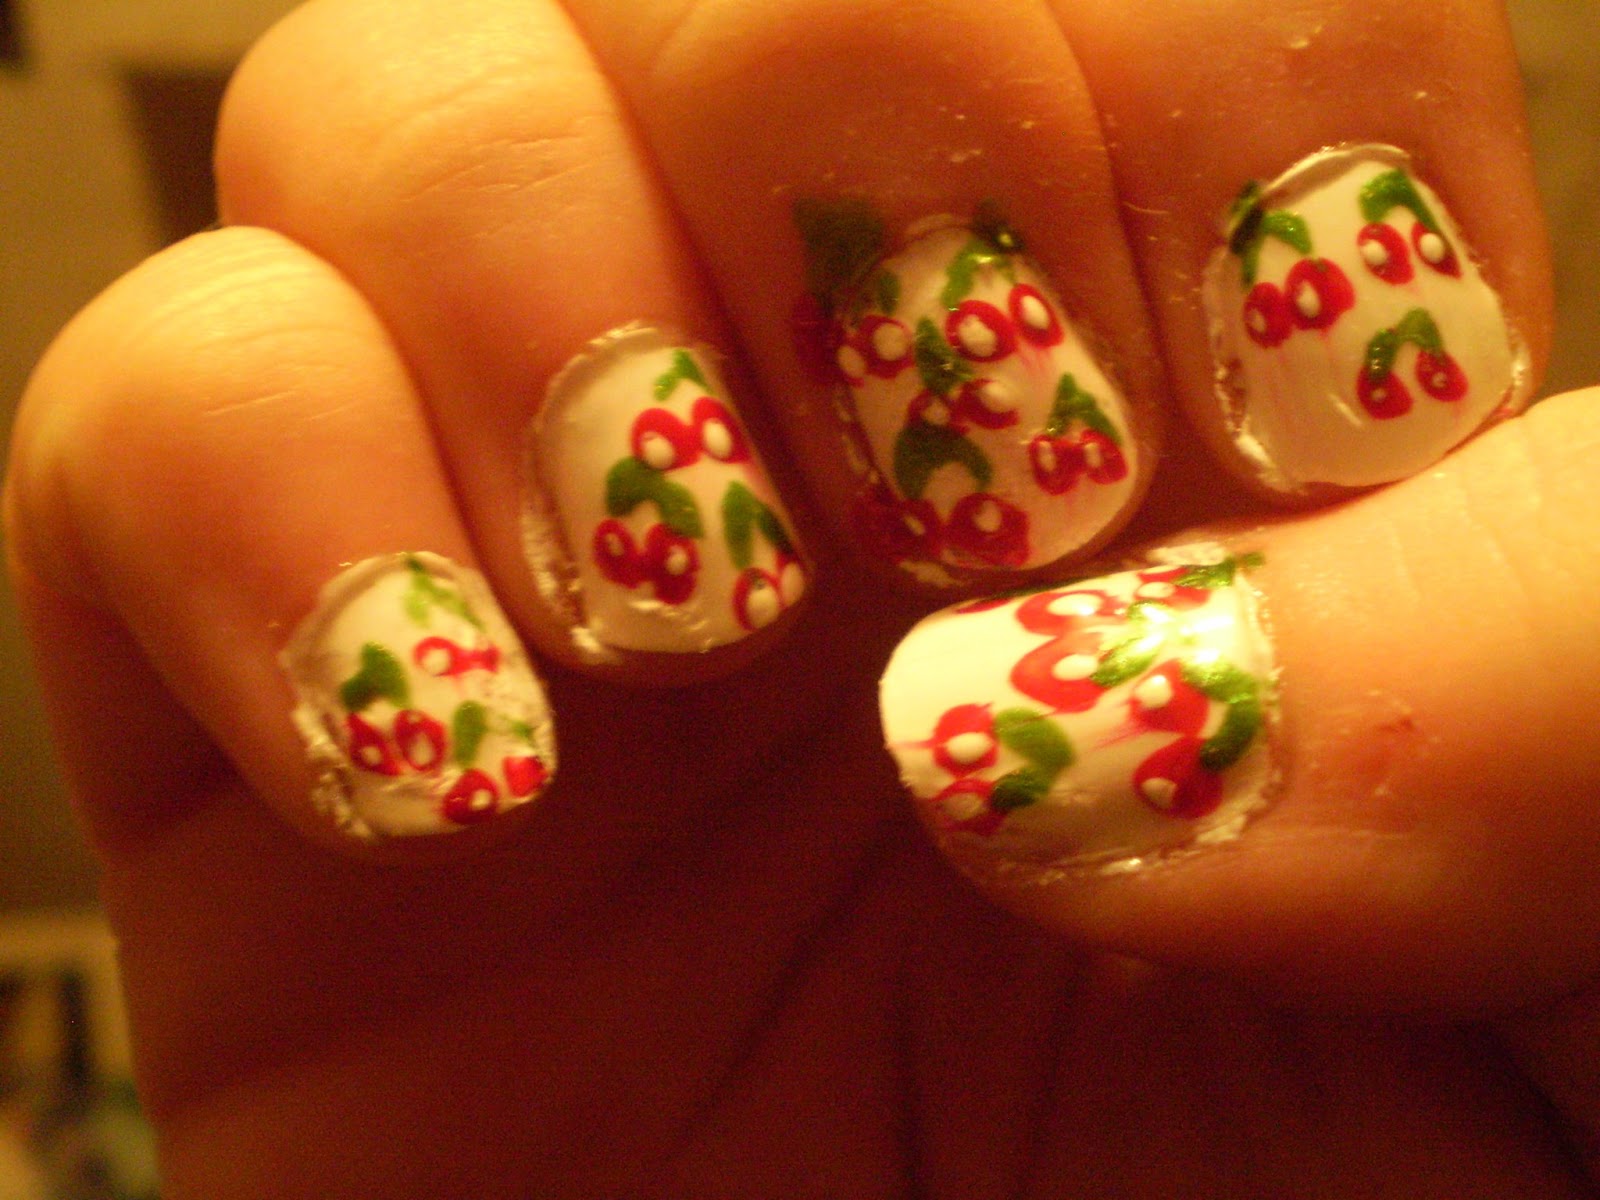
Ugh, the infamous "Cherry Incident". I saw a cute nail art of cherries and I thought it would be simple to duplicate. So I tried it out on my thumb. Not bad, but not too good.


Fine, not too bad, I can work with it. So I go ahead and do the rest of my hand. Hmm, this is starting to look worse and worse...


But I soldier on and do my right hand. It is hideous and nothing is gonna save it. I didn't even bother with clean up, I just got rid of the paint and did something else. *Shudder* man, just looking at the pics a year later and its still bad. Not "oh I was still new and didn't know what I was doing", no this is just bad.


Spinning Wheel

Not as terribad as the cherries is my spinning wheel nails.


Nail art isn't my only passion. It's not even my first. Spinning and Weaving is something I've adored for years now. Last year I was going to my local Fiber and Folk Art Fair and decided to paint my nails for the occasion. Well, it's not terrible, but still just isn't very good. After this I nearly swore off freehand entirely.


The drop spindle on my thumb is cuter than the wheel I think.

Well, that's enough damage to my ego for one day. Have a fun April Fool's Day everyone.