
Water Marbles are what started it all for me. This stunning technique takes some practice to get the hang of, but when you do the results are amazing. Water marbles are time consuming, so be prepared to set a few hours aside, find a quiet corner to work, put some background music on, and create!
This is a photo heavy tutorial. Check out the process after the jump...

First up, what do you need? I have an old small vase thingy that I love to use for marbling. Traditionally a shot glass is used, but I've used a large brandy snifter, a solo cup, and a water bottle that had been cut in half. Here is an interesting tip, whatever you end up using, pour your water into it the night before you paint your nails. I have no idea why this works, but after trying it both ways (both with water from the tap the day of and day or days before) I find it actually does help. I'm not sure it's any more magical than the water has a chance to come to room temperature, but maybe the mystical polish pixies bless the water overnight. It could happen.
Next, the water. Some people swear by bottled or distilled. I use tap and haven't had much problems. Keep paper towels on hand for mopping up drips of water that will get everywhere. You'll also need a stick of some sort to draw designs in the polish. I have this mini orange stick that comes to a point on one end I like to use, but knitting needles, pencils, bobby pins, just about anything long and pointy will work. And keep on hand the things you prefer to use for clean up. I use cotton swabs and remover to clean up the edges of nails.
And last, the polish.
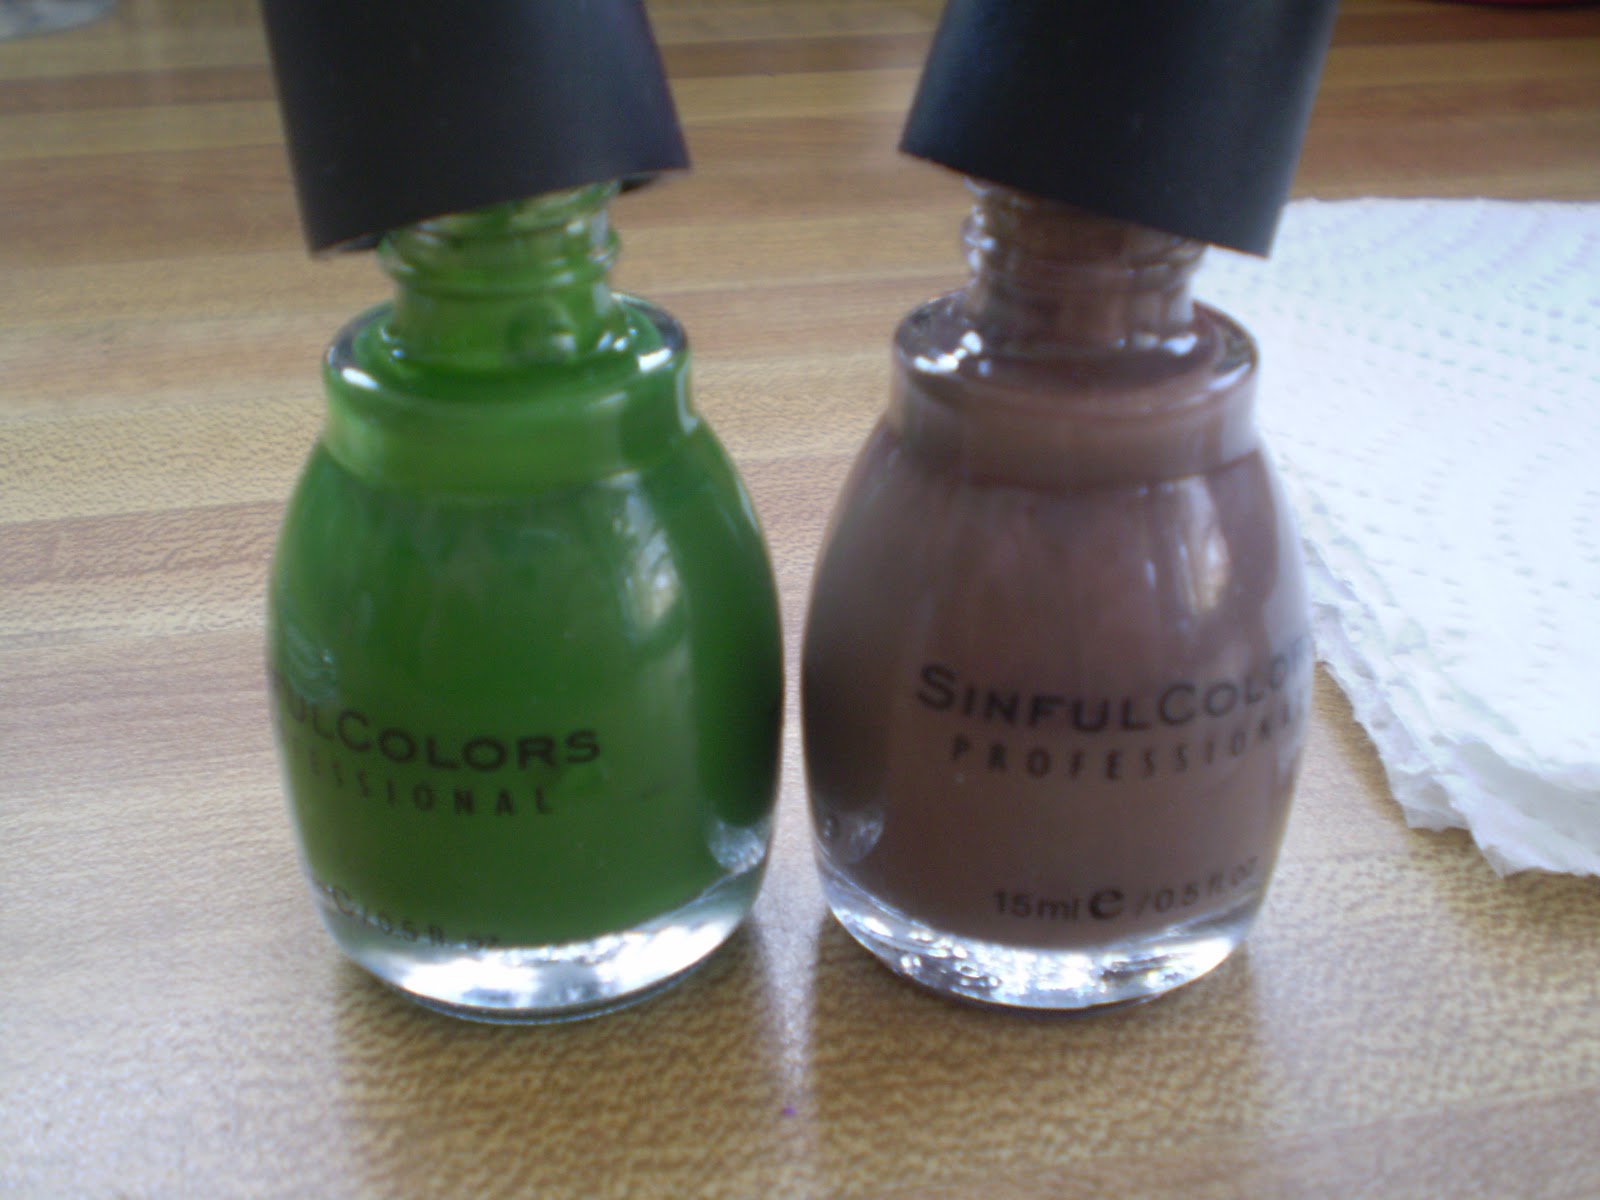
The polish you use should be decently pigmented. If it paints your nails in one or two coats it should be fine for marbling. If its too transparent or sheer it just won't show up well in the marble. The polish shouldn't be thick either. Thick polishes don't spread as well as thinner ones do. What brands work is harder to tell. I haven't found any brands that simply don't work, but some that do react differently than others. The only thing I can say is trial and error. I like to stick with one brand in a marble at a time, but that isn't a hard and fast rule.
Oh and another trick for you, loosen the tops so you don't have to unscrew them when painting. Most of the time when marbling you have to work quickly and loose tops help tremendously. Just be careful not to knock them over when working (voice of experience).

Because the green I'm using isn't as strongly pigmented as I like in a marble, I painted my nails white first so the colors show up better. This is a trick that I found works wonderfully, but particularly well with pastels and neons. Painting them white does add another step and more time as you wait for it to dry. Like I said, this is a time consuming manicure.


Here's some basic science for you. Polish is lighter than water. When polish is dripped onto water it floats on top. Pretty cool! The polish hits the water and spreads out in a very thin layer on top of the water. In water marbling, you drip one color after another and make a kind of bulls eye pattern.

This was for Earth Day so I used green and brown. One drop of green then a drop of brown right on top of it, then another green...you get the idea.

Now take your pointy stick thing and start drawing lines in the paint. You want to drag the colors into each other. I like to pull the outside edges in and make flower petal looking things, but experiment. One technique I'm still trying to perfect is swirls.

Clean the tip of the stick thing as you go or you start getting a gummy mess. Here is the flower petal design I prefer made by dragging lines from the outside in.

Find a pretty spot you like in the paint and dip your taped up nail into it. Hold it under the water and blow on the paint still floating to dry it faster. I simply couldn't figure out how to put my finger in the water, clean the surface and take a picture all at the same time so I'm using a fake nail on a chopstick for a couple pictures just so it's easier for you to see what I'm doing.

Blowing on the water will dry the paint still floating on it. With your finger still under the water, grab a cotton swab and wipe up the paint still sitting on the surface. When you lift your finger you don't want this extra polish to get all over your newly painted nail, so get it off the water before pulling your finger out.

Here is the fake nail I painted for those few frames.

Here is what your taped up nail looks like when you pull it out of the water. See that mess all over the finger? It's all on the tape. When you take the tape off the only polish that needs to be cleaned off skin will be little triangles on the sides. You can see the triangles that still need to be cleaned off on the ring finger next to the still taped up pinkie.

Remember I said to get all the polish off the surface of the water before lifting up your nail? Well here's what happens when you miss a bit. A thin string of floating polish landed on my right hand pinkie when I was rushing to finish my mani. Take your time and clean the surface and you won't get these hairs in your mani. It looks like a crack in the polish or a cat hair.

And here is the mess of my workstation after finishing this water marble. This is the second time I've made a tutorial for water marbling. The first was a video I made, but it wasn't very good. I had also just started watching a popular YouTube nail artist, so when I made the water marble video (my first video I ever made as well) I kinda made it just like she did. Now I've somewhat developed my own style of videos, but this first one was heavily influenced CutePolish and her videos.
No comments:
Post a Comment