Showing posts with label Water Marble. Show all posts

Saturday, November 13, 2021

Pink Water Marble with Injured Finger. *WARNING* Graphic Photo After The Break!


Late in 2015 or early 2016 I got my finger caught in our car door. I really mangled and bruised my index finger to the point that we thought I might loose the nail. I didn't but it was a close thing. I went weeks without painting my nails letting the bad one heal up until it was driving me crazy and I painted all but the bad one. I say all this because after the jump break there is a picture of my hurt finger. It's not really that bad, most of the damage had healed by the time I did this, but it is a very large nasty bruise. I just want to warn you, if that makes you squeamish DO NOT CLICK THROUGH TO THE REST OF THE POST. All the important information is right here, there is only more pictures on the other side and one is of my hurt hand. YOU HAVE BEEN WARNED!

Oh, this is a water marble using 3 Sally Hansen colors that I can't remember the name to. A very pale pink, a bubble gum pink and a dark pink.

Friday, July 4, 2014

4th of July 2014 Skittle


I don't know why I was so excited for 4th of July this year. Usually I just try to catch glimpses of the fireworks going off thru the trees outside my window without ever leaving my own room. This year was different for some reason. My city stopped putting on fireworks displays a few years ago because of cost but for some reason did it this year. Only this time they charged you to get into the park to watch it. Guess they have to pay for the displays somehow. So I spent the night on a bridge just outside the park and still got a great view of the fireworks. Sorry, I'm broke.

I was excited to do 4th nails and decided to do skittles. Well, not actually decided. The fact is I COULDN'T decide what technique I wanted to do...so I did them all. I had a vague idea that maybe I would pick the nail that turned out best and redo the rest to match. That didn't happen so skittles it was! I used the same 3 polishes on all the nails, just the technique changed. Essie "5th Avenue", China Glaze "Snow", and Sinful Colors "Endless Blue".

I'll go the the nails one at a time tho.

Left hand

Thumb: Over "Endless Blue" I simply used Salon Perfect "Speck-tacular"
Index: Messy Mansion stamping plate MM15 and little rhinestones I got at a dollar store.
Middle: Blue and White striping tape I got at WalMart by Salon Perfect
Ring: Watermarble. I really should have painted the nail white first to make the color stronger and hide the bald spots but I was excited and didn't think it thru too well.
Pinkie: Small nail decal by Salon Perfect


Right Hand

Thumb: Salon Perfect "Starred and Striped" and "Grand Finale" over "Endless Blue"
Index: Another Salon Perfect Decal
Middle: Another Watermarble. This time with a white under coat
Ring: I loved the Index on my left hand so much I wanted to do it again on my right. 
Pinkie: This was the first time I had ever used loose glitter before. This is "Endless Blue" that I topcoated with a slow drying topcoat and then brushed some loose glitter over the bottom half of the nail. I added a star rhinestone that I got from a dollar store years ago and topcoated the whole thing.


I wore this polish for longer than I usually do and something odd started to happen. The topcoat started to eat the color off of the metallic striping tape. This is after the first topcoat and you can see between the white stripes that its turning silver. I re-topcoated it again a few days later to keep the edges of the tape from lifting up and the blue almost completely turned a silver brownish color. Very odd and something I need to keep in mind when I use this tape again.

Friday, April 11, 2014

China Glaze Water Marbling Kit.


I wasn't planning on doing another water marble post so soon after that last one, but at Sally's Beauty Supply yesterday I came across marbling kits that I was very excited to try! China Glaze polishes are 5.99 with a Sally's card and the kit is 13.99. In the kit is 4 polishes, a plastic cup and a small orange stick. So it was way cheaper to purchase the kit than to get the polishes individually. Twirlin' and Swirlin' (pictured above) comes with the polishes "That's Shore Bright" "Pink Plumeria" "Snow" and "Too Yacht To Handle". There is a second set that I didn't purchase called Spin Me Round. I already owned "Celtic Sun" and just got "Snow" in the other kit, so I just bought the 2 other colors "Turned up Turquoise" and "I'm With The Lifeguard" to finish that set. Nouveau Cheap just did a post on both kits as well.


First up the cup that comes with the set is considerably smaller than the cup I'm used to using. Now I thought right away that it was useless and I'd never end up using it, but it is actually pretty nice. I'd never used something so small, and with smaller cups you can get more intricate designs.


Like all marbles, first up you paint your nails white and tape up the finger. Add the polishes to the water, swirl em around, and dip in your finger. For better directions check out my water marbling post here.


See? With the smaller cup you can get more design to show up on the nail easier. Cleaning the surface of the water was easier as well.


And here is the finished product. I only did on finger to test it. After this success I decided to do a whole hand using the polishes that come in the other kit Spin Me Round. "Turned Up Turquoise" gave me fits, but otherwise all the polishes work very well for marbling. I am impressed!


Monday, April 7, 2014

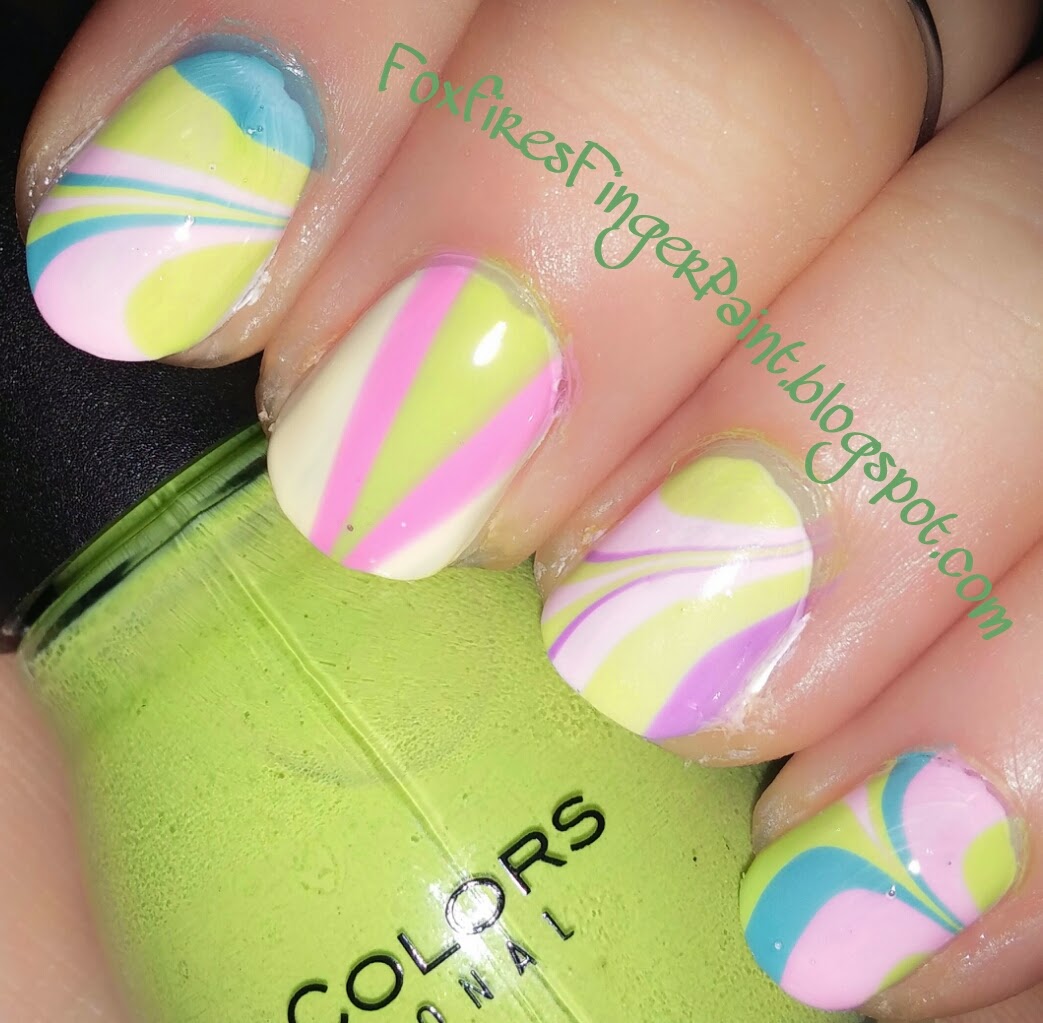
Spring Watermarble ~ Flora Glow


A new month, a new challenge from my nail art group World of Nailcraft! This month is was the palette "Flora Glow". Lovely soft pinks, teals and greens and at least one nail had to be watermarbled. You all know my love and fascination with watermarbles, so I had to get on this right away!  I put a base down of white and used all Sinful Colors for the marble. "Cotton Candy", "Unicorn", "Pistache", "Sweet Nothing", and "Tempest". Here is the image we were given as inspiration:


I wish I had more of the teal like blues, but I think I rather nailed the pinks and light yellow. The blue, purple, and green I added because it complemented the other 2 colors and I didn't want just a pink and yellow marble.

Friday, September 20, 2013

31 Day Challenge: Day Twenty ~ Water Marble


This prompt made me giggle. I love Water Marbles! They are what got me into nail art in the first place and will always hold a soft spot in my heart. But where to start? With all the colors under the sun at my disposal, what to do? I really thought about my go-to color, green, but my last marble was green. As I sat at my desk my eye caught on a bag of polishes I just bought. 2 of my new colors, Milani "Wild Violet" and Sinful Colors "Tokyo Pearl", really reminded me of that very first water marble. I decided that if I was gonna redo that first mani, something had to be different. I'm still perfecting swirls instead of the classic petal style marble. I still have work to do there, but otherwise it turned out pretty neat. I did a base coat of "Tokyo Pearl" on all the nails, but Pearl didn't want to marble, so for the actual marble I used China Glaze "Ice Cap".

My original water marble, 2 or 3 years ago, my first nail art ever:


This is the traditional petal style marble using Cover Girl Nailslicks "Silver Belle" and Sally Hansen "Purple Potion". And this ends the Pattern section of the Challenge. Tomorrow starts the Inspired By portion. I'm gonna have a lot of fun with that :D


Thursday, September 5, 2013

31 Day Challenge: Day Five ~ Blue

Yesterday I said I was just gonna pull out an archived photo for Blue Day, but I did try and make an effort today to do a blue mani. They are painted blue right now, it's just, that's it. I was running late and didn't get a chance to do anything else to them. No art. They are just blue. Here they are:

Wet n Wild "Blue Wants To Be A Millionaire?"

Neat polish, but boring for you guys to look at, so I also pulled a blue mani out of my stack of photos for you guys. I did this last winter (I think) trying to mimic IndigoNova1's design on her YouTube channel. 


Its a water marble that I went over and dotted after it dried. I think I used Sally Hansen "Blue Me Away" and "White On" but I'm not really sure. I definitely should have painted my nails white first so the colors would have stood out better, but I was still new back then. Heck I still am. There you go, you get 2 mani's from me today!


Tuesday, August 27, 2013

Green Water Marble


Wow, I didn't even notice it but yesterday's "What Makes You Happy?" post was my 100th post. Doesn't seem like a whole lot, but it's my first real milestone. That makes me happy o.~ ! Anyway, I did the water marble on the index and loved it so much that I did it on all my fingers on my right hand. China Glaze marbled so nicely. This is "Starboard" "Treehugger" "Running in Circles" and "Ice Cap" marbled over Wet n Wild "White Creme" base. I was so thrilled when the glitter in "Running in Circles" and "Ice Cap" didn't sink to the bottom of the water like some glitters do in a water marble. So far of all my polishes, China Glaze behaves the best for water marbles.

Monday, August 26, 2013

What Makes You Happy?


A facebook group I'm in was running a "What Makes You Happy" contest and this is the mani I submitted. Seriously, my favorite thing is learning new techniques. This here is nearly all the different nail art techniques I've explored so far. The index is a water marble, the middle is a gradient with stamping, the ring is my first attempt at an alcohol water spotted, the pinky is striped and dotted, and the thumb is a plastic wrap marble. I also love the color green and the China Glaze brand. The colors used are China Glaze "Starboard", "Tree Hugger",and "Running in Circles". Also used Wet n Wild "Black Creme" and "White Creme". The stamp is BundleMonster BM221.

Fun story about the middle finger, I painted the index and middle then got called in to work to cover a sick co-worker. At work I broke that nail. All the way to the quick. Before I took photos. Hanging on by the tiniest threads I coated the nail in the only thing I had, super glue. When I got home I topcoated it and took the picture. You can't even see the break now. I'm curious how long the glue will hold. Hopefully long enough for it to grow out again.

Tuesday, April 23, 2013

How To Water Marble


Water Marbles are what started it all for me. This stunning technique takes some practice to get the hang of, but when you do the results are amazing. Water marbles are time consuming, so be prepared to set a few hours aside, find a quiet corner to work, put some background music on, and create!

This is a photo heavy tutorial. Check out the process after the jump...

Monday, April 22, 2013

Earth Day Water Marble


So a few days ago, when we had a brief spot of sunshine, I decided I was gonna take the pics I need for a water marbling how-to post. Simple enough, right? I've done a few marbles by now and know what I'm doing. Well, nothing wanted to work that day. My workshop was cold, the water was cold, the polish was cold, nothing was working right. Polish didn't spread on the water, and when it did, it dried instantly so I only had time to take one picture, then have to restart the process for the next picture. But I soldiered on and got some pics taken. They were awful. Disgusted with getting nothing accomplished I walked away for a few more days. Today is Earth day and for the first time this week it was beautiful outside! The sun was shining, my workshop was warm with light streaming in. It was a happy day so I decided to give marbling another shot. I've never had a water marble go better! It went so well that I could stop and take pics and the polish still hadn't dried yet so I could continue without have to restart the process for each pic. It was like the polish was apologizing for misbehaving the last time :)

Anyway, here is my Earth Day mani. Sinful Colors "Exotic Green" and "Nirvana". Tomorrow I'll post how to do a water marble yourself!

Tuesday, November 27, 2012

"Just Google It"

I've always had a mild interest in nail polish. I think up till last year I had a dozen or so polishes. Nothing fancy, just some glitters and some favorite colors. But last year that all changed rather drastically. On a random whim I painted my nails. I hadn't done it for years but I was feeling pretty that day. My co-worker noticed and we started chatting bout polish. Then she mentioned doing something I had never heard of, water marbling. She tried for several minutes to describe just what it was then, frustrated she said "just look it up on Google." So I did. And oh my goodness! The doors to Nail Art just blew open in my face! I was stunned not only by the water marbling but by the concept of nail art. After a little research, a few polishes, and an absurd amount of enthusiasm, I tried my first marble.

My First Water Marble
Sally Hansen's "Purple Potion" and CoverGirl's Nailslicks "Silver Belle"

I think if that first attempt didn't go as well as it did then thing may have turned out differently. However things did go very well and I was in love! That was just over a year ago. My dozen or so polishes are nearly 300 now. I've attempted so very many techniques and have had so much fun every step of the way. Now I'd like to share what I've learned for the next girl out there who was told to "just Google it."