Showing posts with label Wet n Wild. Show all posts

Friday, October 29, 2021

Halloween 2021 Black to White Spiderwebs


I'm loving this simple gradient. Sally Hansen's black fades into a cool Orly grey and into Pueen's stamping white. I wanted the spiderwebs (a MoYou stamping plate) to fade into the white at the tips so I used the same stamping white to stamp the webs. It kind of worked. You can still see the webs at the tips so they didn't fade completely away. This is all so a rare shot of my right (or Cindy) hand. The left one got some weird wrinkling and bubbling going on in the top coat. I think I globed it on too thick because I was worried about smearing the stamping and it just dried weird because of it. But in my defense I was running late for work.


Hand made and painted mask, hand made hat, hand done make up and polish...I am loving this!

Saturday, April 27, 2019

Celtic Knotwork


I think this is from St. Patrick's Day 2015? or 2016? I don't think the color is my beloved China Glaze "Running In Circles". I'm pretty sure it's Wet n Wild's "Emerald City"? I'm pretty sure it's layered over another green, but I'm not sure. It could just be several coats of "Emerald City.  Stamped with a black, probably Cosmetic Arts "TGIF" and a gold that might be Maybelline's "Bold Gold". A lot of this is guess work. It's been a long time since I did these nails.

Tuesday, April 14, 2015

Supernatural Stamping


Welcome to my new obsession! I've always liked the TV show Supernatural, but these last few months my interest has exploded into obsession. So when cruising my nail art group on Facebook someone mentioning a Supernatural stamping plate caught my undivided attention. Sure enough, Apipla made a small plate (I mean really small. Like 2 inch by 2 inch) dedicated to Supernatural. I may have squee'd a bit when it showed up. Super excited I slapped this mani together real fast. A bad french tip white by Color Workshop I had lying around made the base. I used two coats, but maybe I could have used a third because you can still see some streaking in it. I stamped with Wet 'n Wild "Black Creme" and added a little splattering with Essie "5th Avenue." Sorry for the dry cuticles, work has been rough on my hands these last few weeks.


On the plate you have the Enochian angel banishing sigil, 2 pairs of wings, Bobby's face, the Impala, the front of Castiel's trench coat, Ruby's knife, the anti-possession tattoo, a gun, what I assume is Dean's face but it's not too clear, and the words I <3 SAM!, I <3 CAS!, I <3 DEAN!, I lost my shoe., and I'm Hunter!. I think the I'm Hunter! is a typo and it should read I'm A Hunter!. I think if I ever use it I'll grab the A in the middle of Sam's name to add to it.

I'm loving this manicure. Supernatural is new tomorrow night with the return of my favorite character Charlie! Perfect nails for the occasion.

Tuesday, February 24, 2015

Ali's Wedding Nails


My co-worker got married this past weekend and asked me to do her nails for her. I'm not a professional so I was super flattered to be asked. We brainstormed several different things for what she liked and she surfed Pintrest for art ideas before she settled on this simple black tip with a gold heart accent. The base color is Finger Paints Endless Wear "Nude Sketch" that matched her dress nearly perfectly and the tips were done with Wet n Wild "Black Creme" and a striping brush. The gold heart was done in Maybelline "Bold Gold" and a dotting tool. Simple and elegant.

Congratulations Ali!

Sunday, August 31, 2014

Quick Galaxy


So a new season of Doctor Who is upon us! I really wanted to do something, but inspiration was a bit lacking at the moment, so I settled on my go-to mani for SciFi shows. A Galaxy Manicure! I started off by painting my nails with Wet n Wild "Black Creme". I got 4 no name metallic polishes from a dollar store that I was itching to try. I sponged the metallic purple in random places. On top of that went the metallic blue, then green, and then copper. The copper really didn't look right in the nebula, so I sponged over it with Sally Hansen "Red-io Active" a metallic red. I wanted the TARDIS to stand out on the nail, but I think using the stark white Cosmetic Arts "Picture Day" was a mistake. It just was too bright. The stamp is from MyOnlineShop MJ XII. I topcoated the whole thing with Out The Door "Northern Lights" a diffuse holo glitter fast dry topcoat.

Friday, July 18, 2014

Dragon Eggs


These magnificent little gems have been popping up in all my nail polish groups these last few days. Dragon Eggs! I adore them! The tutorial I have been following is by Accio Lacquer.  The only real difference is she says she used about 200 thumbtacks, but my count is closer to 600, but I think that is mostly because I got a bigger egg by accident. That's right, you heard me, thumbtacks. The basic idea is you paint the heads of the thumbtacks with nail polish and push them into a Styrofoam egg. Very easy, but time consuming. And polish consuming I found out.

Materials:


  • Styrofoam Egg
  • Thumbtacks (The large the egg, the more tacks you will need)
  • Nearly full bottles of polish and topcoat (for my example I used Sinful Colors "Enchanted" Wet n Wild "Buffy the Violet Slayer" and Fresh Paint "Candy Crush")
  • Cardboard, corkboard, or foamboard. Something to hold the tacks while you paint them.


No way to get around it, this is the long boring part. Push your thumbtacks into something to hold them in place. First time I did this I used a pizza box. This time I just using a couple sheets of cardboard. Don't push them all the way down or you might get em stuck to the cardboard when you paint. Try to leave some space around each one so they don't get stuck to each other either.


300 tacks....


And 600 tacks. Long and boring, but it helps so much when you paint em.


I started off with Sinful Colors "Enchanted" a deep almost eggplant purple. One coat of that followed by the slightly shimmery color Wet n Wild "Buffy the Violet Slayer". By the time you finish painting the last tack, the first is dry and ready for next coat. I topped it all off with a coat of Fresh Paint "Candy Crush" and lovely flakie. You can topcoat as well, for the green egg I did, but I ran out so purple egg isn't topcoated yet. I think I'll get some spray sealant for it.  For an egg this size you will almost used a full bottle of polish each coat. Like 2/3 of a bottle. That's why I suggest you start with nearly full bottles and cheap ones. First egg I did, my green one, I had no idea just how much polish this eats and used my beloved China Glaze "Running in Circles". It's not empty yet, but it was a wrench to part with that much of it.


This part goes much faster than the stages before it. Time to stick em on the egg! Now the eggs has a narrow and a fat end. You want the fat end to start with.


In the center of the fat end push your first tack in. Doesn't have to be exact, just eye ball it.


Your gonna want to spiral out from that tack. Each tack you put in needs to overlap the last tack you put in. It also helps if it overlaps the row below it too. These aren't glued in (tho you can if you want to) and the tack you put in holds all the tacks before it in place. That sounds confusing. I made a short video of what I mean but blogger is being a pain and not loading it right. I'll keep working on that.


Just keep going spiraling outward and upward.


Get the idea?


Keep going!


And your done! My camera has a tough time with blue-leaning purples, but it is way more purple in real life. I love how the flakie adds just a subtle magic to it.


And my first egg, Sally Hansen "Emerald City and China Glaze "Running in Circles". And I used gold thumbtacks instead of the silver I used in my purple one. Now time to make some sort of padded chest to store them in. I'll be experimenting with smaller eggs later this week. I still want to make a red holographic one and a white pearly one.

Monday, June 16, 2014

SIMPLES ~ Basic Dots


So yeah, I'm just gonna skip over the month of May. No real reason, I just got busy and time just slipped away. It happens. But back to business. I've joined another new FaceBook group, this time one started for the sole purpose of introducing people to nail art. It's called SIMPLES- Nails Art from Muggle to Mastery. It was started by Debbie Crumpet of The Crumpet. It's a wonderful way to get new people interested in nail art by starting very basically and working your way up to more complex designs. The first month was dedicated to just getting people used to the idea of having more than one color on their nails, but I did this manicure with week 5 in mind. Dots!

I started off with a coat of Wet n Wild "Black Creme". I've been having some problems with my undies showing around the edge of my nails so I purposely didn't paint this coat right up to the edge.


I then did 2 coats of Orly "Haily's Comet" The fact that the undies didn't go all the way to the edge is nearly invisible in real life, but for some reason this picture shows it clearly on my thumb.


I then used my new dotting tools I just picked up at Wal-Mart to make big and small dots on just one side of the nail. I used an old discontinued Sally Hansen color called "Black Pearl Chrome". Sally Hansen has just released new chrome colors and I'm dying to pick a couple up and see if they match up to the old discontinued chrome colors.


And there you go! A very basic dot manicure that I really love. I think I'll go back and do the first 4 weeks as well. I'd like to follow along, I'm sure there are techniques I've never done before. Here is the plan for SIMPLES:

Let's Just Paint

Week 1 - Plain Accent Nail
Week 2 - Plain Skittle
Week 3 - Ombre
Week 4 - Saran Wrap

Basic Dotting

Week 5 - Dotting Tools - Basic Dots
Week 6 - Dotting Tools - Mixed Dots
Week 7 - Dotting Tools - Multi-Coloured Dots
Week 8 - Dotting Tools - Dots Within Dots

Back To Bases

Week 9 - Splodging
Week 10 - Watercolour
Week 11 - Gradient !!!!!!!!!!!!!!

Putting It Together

Week 12 - A Splodged Base or Saran Wrap Base With Dots
Week 13 - A Skittle with Dots
Week 14 - A Gradient with Dots

Dotting Tools Do More Than Dots

Week 15 - Ruffle
Week 16 - Leopard
Week 17 - Camoflage
Week 18 - Flowers

Friday, April 4, 2014

Koi Fish.


I almost named this post "Jelly Fish" for no other reason than it made me giggle. After my fail of a seahorse, I still wanted to try making an image go across all my nails. Other than a little mess up on the middle finger (it's a bit twisted) I really like it! I painted my nails white (when my bottles of white get low I pour them all into one bottle, so this is a mixture of Sally Hansen "White On", Wet n Wild "French White Creme" and Milani "White On The Spot") I then stamped with Cosmetic Arts "TGIF" using Messy Mansion plate MM29. I colored in the Koi using OPI "Y'all Come Back Ya Hear?" making sure to leave uncolored white patches. Then I filled in the water with a frankened blue jelly I made. I love this so much more than my seahorse from the other day!

And here is the Koi fish for comparison in-case you're not sure what a real one looks like.


Tuesday, March 25, 2014

Police Nails


My Uncle just celebrated 30 years with the police force and will be retiring soon. I just got Messy Mansion's plate MM28. Coincidence? I think not. The universe is obviously telling me I need to do a crime and punishment mani so here it is. I rushed the stamping a bit because I was running late for work, but over all I like how it turned out! Index, middle and pinkie are all painted an unnamed grey from Fingr's and stamped over with BundleMonster's BM414 using Wet n Wild "Black Creme". I then used MM28 again and Cosmetic Arts "Picture Day" to add some fun images. Oh, the DNA strands are from MM25. The ring and thumb are Sally Hansen "Lighting" stamped with MM28 again in "Black Creme". I really do like it. The grey fingers remind me of fingerprint dust. Many people don't know this, but I started taking classes thinking I wanted to get into forensic science. That was the vague plan anyway. Then one semester I took a microbiology class as just a prerequisite and fell in love with micro. So Forensics fell to the back-burner as Micro took front stage, but it still holds a soft spot in my heart.


Saturday, March 22, 2014

LeadLight Flowers

I got a new Watermarking software for my pictures!

Well, we made it past St. Patrick's Day. I love the holiday, but it's time to hang up the green polish for a little bit. Maybe next year I won't start my celebration right after Valentine's Day. Today we have a neat technique that I'm sure has been floating around out there for a while, but I only just discovered it when Messy Mansion posted about it a couple weeks ago. I may do a tutorial on it soon, but for now I'll let Messy Mansion explain it herself. Now she calls it the Leadlight technique after her new polishes coming out and that's what I call it too, but it also goes by "glazing". The term Leadlight makes me think of stained glass windows with the lead strips that hold the colored panes in place. I'm not sure what Messy Mansion had in mind when she came up with the name. The basic idea is a light color background that you stamp a dark color over. Then use sheer or jelly polishes to fill in the colors. The colors will stand out over the light color, but won't obscure the dark color lines. I've used a white background (Sally Hansen "White On" and Wet n Wild "French White Creme". I was running low on white so I poured them both into the same bottle) I stamped with Wet n Wild "Black Creme" using MoYou Pro 06. Then I filled in the flowers and leaves with Sinful Colors "Irish Green" and OPI "Guy Meets Gal-veston" and "Y'All Come Back Ya Hear?". All three are strongly pigmented jellies that I don't get a chance to use all that often.

So what do you think? I think this is a good substitute for those that just can't seem to get the hang of stamping decals, tho not a replacement for them. You have the limitation of only being able to color over light colored backgrounds. Other than that, it does seem to be a viable option for art in its own right.

Monday, March 17, 2014

Happy St. Patrick's Day!


And a simple design to finish off my St. Patty's day celebrations! I wanted a very simple cream base so the glitter I added to the accents would stand out better. OPI "Jade is the New Black" as a base color. I don't have many OPI's as they tend to be more expensive than my regular fare, but this was a gift. I never understood why OPI is so popular, but I think I get it now. I was very pleased how this dried even before I added the topcoat. And application was a dream too. If only the decals had behaved as readily. Messy Mansion MM04 is wonderful to work with, but I'm still getting the hang of decals and these ones put up a fight. Wet n Wild "Black Creme" filled in with Sinful Colors "All About You" and "Gold Medal". I thought they came out wonderfully, and at a distance they really don't look all that bad.


But close up? Ugh. Bubbles in the paint. A lot of bubbles in the paint. The more it dried, the bigger the bubbles got. I'm at my wits end with this problem. Then as the ring finger dried it got these weird ridge-like wrinkles in the topcoat. Please, any advice would be greatly appreciated! Leave tips and tricks in the comments section.


Friday, March 14, 2014

Happy Pi Day!


Ah, Pi Day again. This year I'm happier with the results. I do seem to be craving spring it seems, the colors I chose look a bit Easter-ish to me. For those that don't know, the mathematical constant Pi is the circumference (the distance around) a circle divided by its diameter (a line that cuts thru the middle of a circle). It doesn't matter how big the circle is, the Circumference divided by the diameter will always equal 3.14159....(it's a very long number. No one has found the end of it yet). This number is also called Pi, named after a Greek letter.  There are a few numbers in math that do this, but not all of them share a name with a tasty dessert. Mmmm...Pie....


First the basecolors: Here we have on the index Sally Hansen "Grape Race", the middle has China Glaze "Seahorsin' Around", the ring finger has China Glaze "Running in Circles", the pinkie China Glaze "Wish on a Starfish" and the thumb Sally Hansen "Lighting".


Second the stamping: The black is Wet n Wild "Black Creme" and the freehanded Pi symbol is Sinful Colors "Gold Medal". Since the blue, green and pink were glittery I added a coat of China Glaze "Icecap" to the purple and yellow to match. The numbers on index, middle, and pinkie are BundleMonster BM311, the thumb is BM408, and the ring is isolated parts of BM425. The 2 stamps on BM425 actually read I <3 YOU and CUTIE PIE, but I just used the I <3 and PI. That was trickier to do that I thought it would be.


And yes, I am a big enough nerd that I scheduled this post for 3/14 at 1:59am. *giggle*

Monday, March 10, 2014

Celtic Knotwork


I thought I was super clever when I came up with my Book of Kells mani. I guess I was too clever. People asked about my nails and when I proudly proclaimed that they were inspired by the Book of Kells, I got blank stares and "Book of what?". Apparently no one knows what an illuminated manuscript even is. *sigh* Luckily my first order of Messy Mansion plates came in yesterday so I can go back to playing with classic green manicures. This is 2 coats of China Glaze "Running in Circles" my fav chunky green shimmer ever. Then stamped in Wet n Wild "Black Creme" using Messy Mansion MM04. I'll be writing a proper review on Messy Mansion later, but short story? I am so impressed! I Love Them!

Wednesday, March 5, 2014

Book of Kells


Well, I wanted to do a St. Patrick's Day mani without using green, and I think this qualifies! I was falling asleep a few nights ago trying to come up with a green-less mani and had a brilliant idea. The Book Of Kells! I could mimic the calligraphy and colors used in that famous illuminated manuscript. I fell asleep that night knowing I had solved my problem. The next morning I could not remember my idea to save my life. I knew I had thought I came up with an answer, I just couldn't remember what that answer was. Frustrating. It took me a couple days, but I did eventually remember it.


A note about the base color. I've been looking for a perfect "old parchment paper" color. Not a stark white, but a slightly yellowed, maybe almost creamy brown type of color. I have not been able to find what I was looking for anywhere. So I decided to make one. I didn't take progress shots because, honestly, I didn't expect it to turn out as well as it did! I took an empty bottle of top coat, poured in some Wet n Wild "French White Creme". I don't use it all that much since I discovered Cosmetic Arts "Picture Day" for stamping. I then added in a small amount of Sally Hansen "Lighting" and a couple of drops of Milani "Dark Coffee". The color was perfect! Exactly what I was looking for!

Image from Wikipedia.

I then sponged on just a little bit of Sinful Colors "Nirvana" in random areas to look like older, browning areas of the paper. Then came freehand time. Using a small detail paint brush I painted large decoative letters on the thumb (Essie "Fifth Avenue" ), index ("Lightning" again), and ring (Wet n Wild "Saved by the Blue"). Outlined the letter in Wet n Wild "Black Creme" and dotted around the edges. Middle and pinkie got random letters that I hope look like the calligraphy in the Book of Kells. I wish I had some Celtic knots to add around the edges, but over all I'm pleased. Turned out much better than I thought it would.

Thursday, February 13, 2014

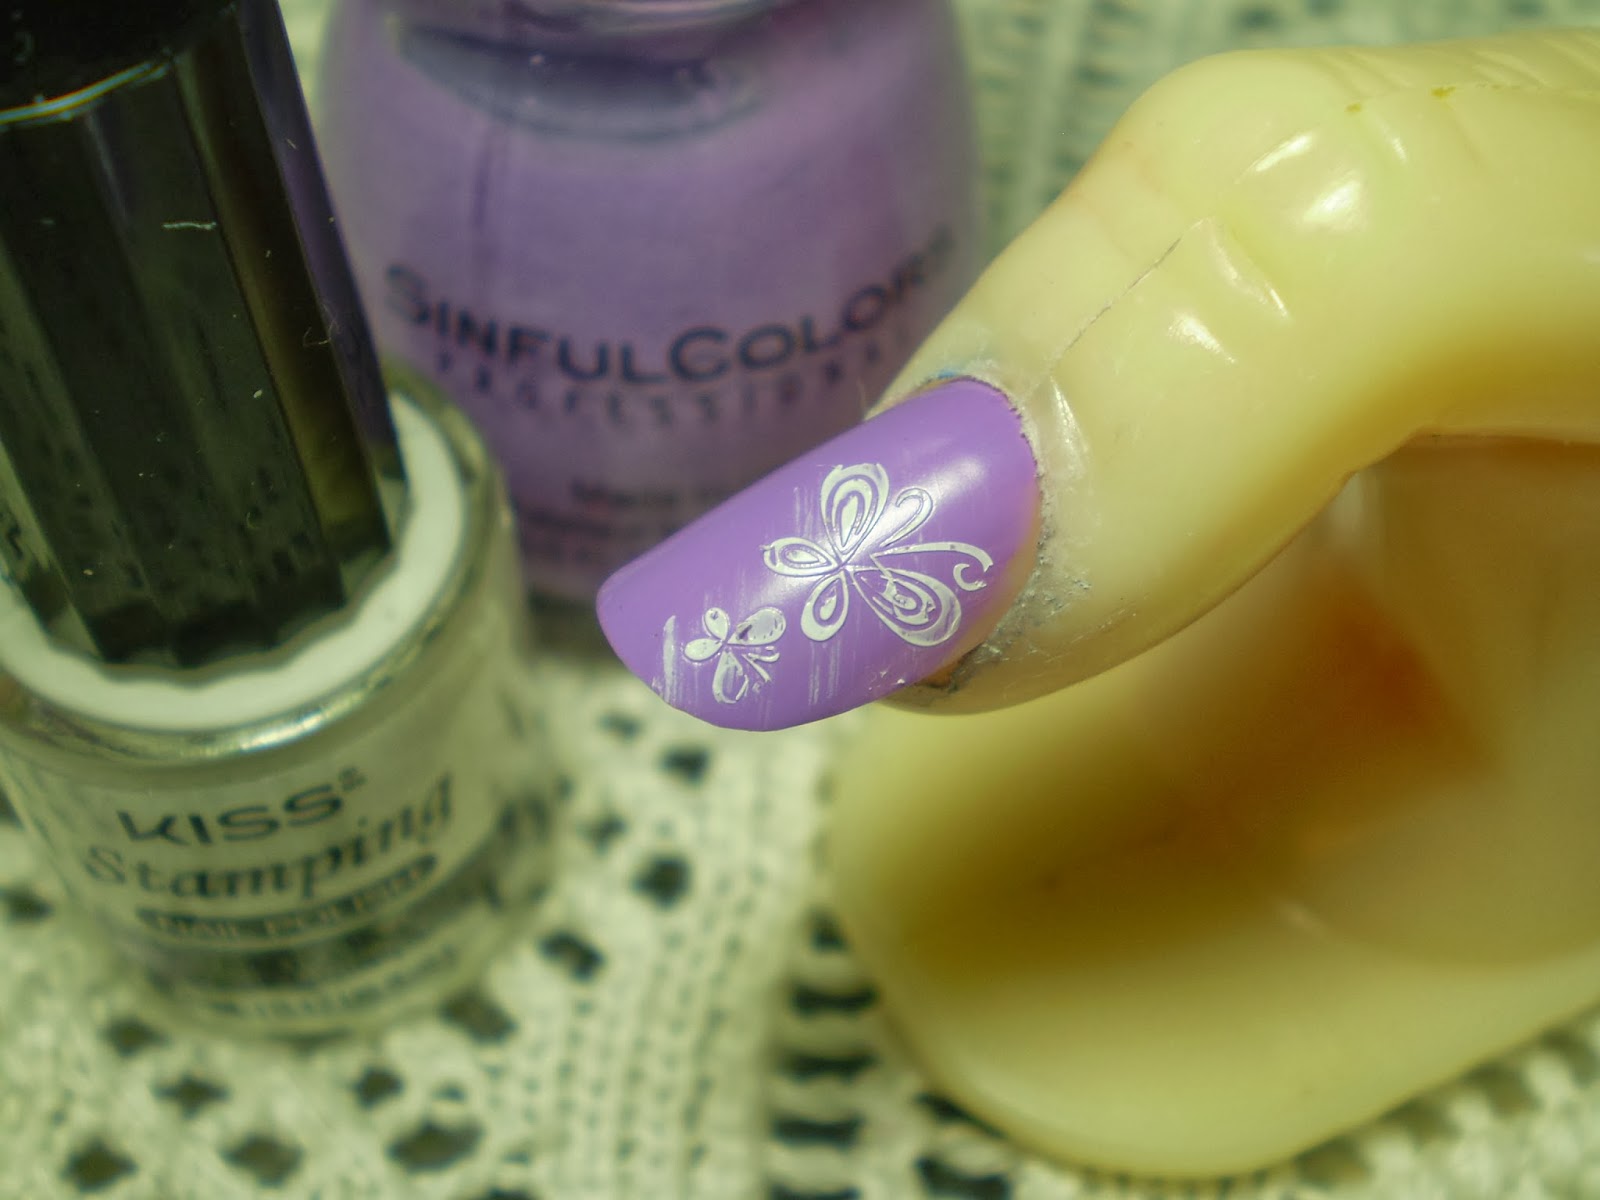
Kiss Stamping Nail Art Kit (Soft Stamping)


I just found this at my local Wal-greens! I have heard of "soft plate" stamping, but had never seen it before. It is an interesting take on the nail stamping technique. There is no metal plate, instead the etchings are right on the stampers. I decided to give it a try and see if it works as well as its metal plate counterparts.


Here is a shot of every thing that comes in the kit. The stamping head holder, 3 etched stamping heads, a small bottle of white polish and directions in several languages.

Sinful Colors "Tempest"

My very first attempt and I'm rather impressed by it. The idea is, you fit the stamping head you want to use into the holder. Then paint over the image you want to use. Rub the stamper over a paper towel to remove the excess leaving paint only in the etched areas and press it onto your nail. You can see I have a little streaky-ness still on the nail from where I didn't get all the excess off. I figured I just needed practice.

Sinful Colors "Pastiche"

This one turned out well, but I think I rubbed a bit too hard. Some of the stamp came off when I rubbed.

Sinful Colors "Endless Blue"

This one I know I rubbed too hard. I lost most of the detail of the flower. That and the blue wasn't dry all the way and smudged a bit.

Wet n Wild "Black Creme"

And finally I used the full nail image. After rubbing too hard the last too times, I don't think I rubbed hard enough here. I got a lot of fog in the image. I was pleasantly surprised by the polish that came with the kit. As a beginner polish, it really is quite nice.  Overall, while this is a nice set and decent for beginners, I don't think I would recommend it as anything other than a novelty. I can see many drawbacks to stamper heads as opposed to stamping plates. One, the stamper head size must be standardized or else each brand would have to sell holders just for their heads. With stamping plates, any stamper can be used on any brand plate. Two, storage might seem like a minor issue, but when I think of the number of plates I have, and try and convert that number into stamper heads...well that would take up tons of space. Three, what about the girls with really long nails? Most metal plate makers make XL series for big images, but a stamper head image is restricted by the size of the stamper. Unless you made bigger stamper heads, but then you would need to make bigger stamper head holders. And the last reason I can think that it's not as feasible as metal plates off the top of my head, how do you care for the heads? I know that many stampers will break down after repeated exposure to acetone and nail polish remover. Will etched stamper heads break down too?

Bottom line? Fun and novel, but you won't see me switching from my metal plates anytime soon.

Wednesday, January 29, 2014

Duochrome TARDIS


Guess who got a new stamping plate? This girl did! I have been drooling over MyOnlineShop MJ XII for months as it is the only plate I've seen with Doctor Who images, and you all know I'm a bit obsessed with DW. So I saved up and got it! I will do a review later, but right now it's so bitter cold (-40 degrees in Chicago) that I don't feel like doing anything. I've been trying out a new base coat and I'm pretty pleased with it. Wet n Wild basecoat is only 99 cents but I got it on sale for 69 cents. I did an under coat of Wet n Wild "Black Creme" so that Fresh Paint "Sugar Crush" would stand out on top of it. The decal is Sinful Colors "Endless Blue" with Wet n Wild "French White Creme" accents. I loved this combo so much I made a necklace of it as well. Soon as I get a decent picture of it I'll post it too.

UPDATE: As promised, here is my necklace: